|
- About |
|
Thinking
Outside the Box: By Paul "Villam" Steed
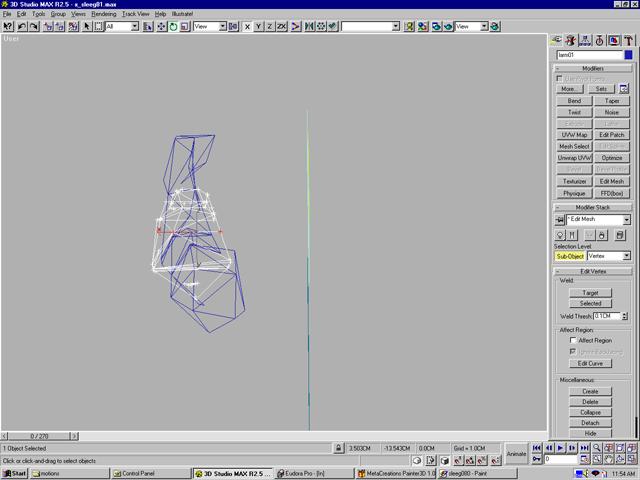
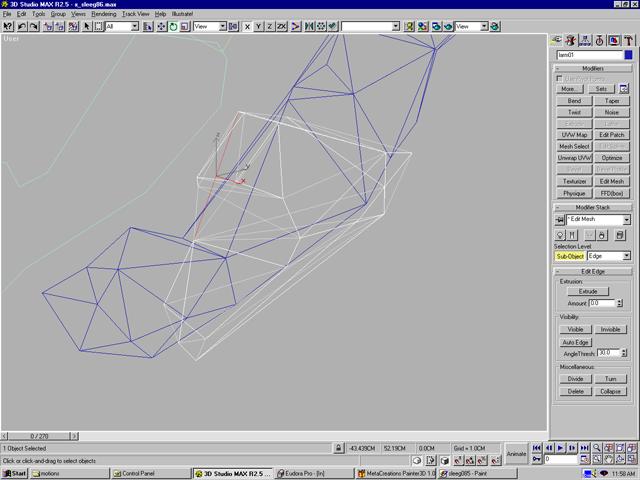
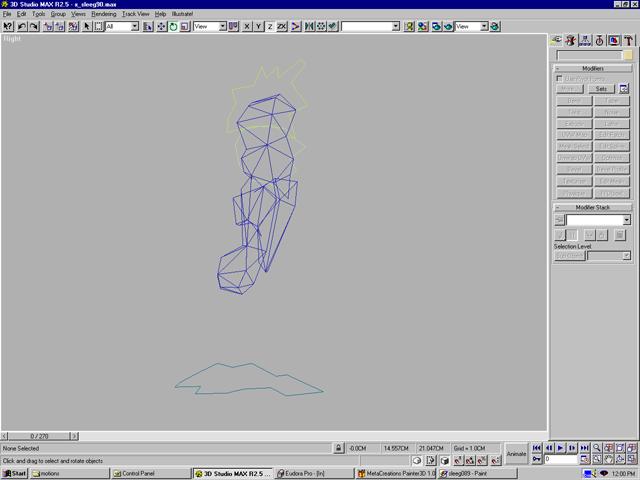
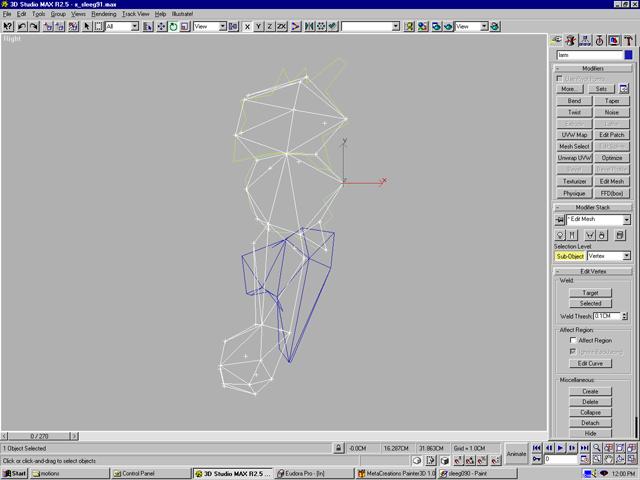
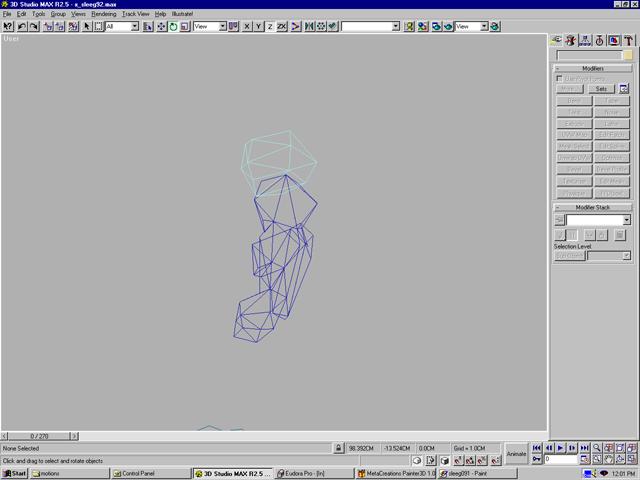
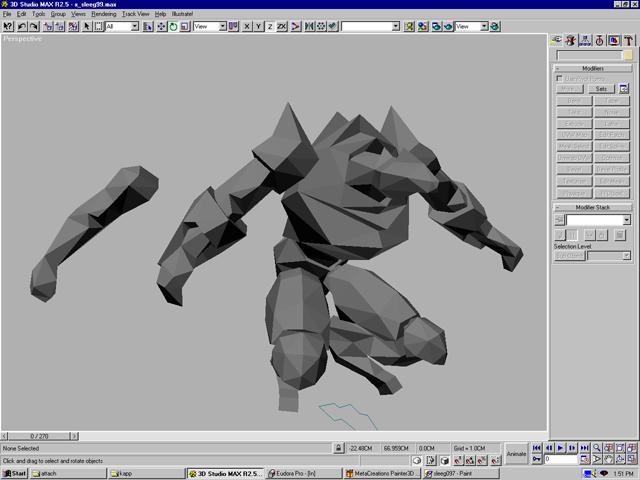
First I notice the arm pad needs some verts adjusted around here and here so I apply an edit mesh to it and scale these guys here out. That's better. Note that if you only scale two verts you can use a uniform scale and don't have to worry about picking a non-uniform scale axis. I move some verts around too here. Now we're ready to optimize the mesh. Select the mesh and hit the optimize button. The default amount of optimization is a face threshold value of 4 and immediately we see some faces drop off the arm pad object. Dial the slider up to about 15 and you'll see the faces start to drop off. I stop at 17.6 and just type in 16 since I like to optimize by hand rather than over-optimize using this modifier. Optimize is like a big lumberjack axe and I liken my optimization ministrations to using an exacto knife. The first area I optimize manually is underneath where three verts are bundled fairly close together. Since I know the arm pad will remain rigid when I animate the monster I don't have to make the object accommodate any flexion or gross deformation. So I select the three verts and u-scale them to a point then I scale some more. Click selected and they're merged. Next I merge some verts at the middle top of the pad and turn some edges that are whacked. Now I spend some time turning edges making sure the mesh looks neat as well as making sure there's no indentations on the pad and it has a fully solid feel to it. As a reminder, I base my edge turnings not only on aesthetics but basically by the 'short is best' rule of thumb. Basically this simply means that you try to make all your triangle as close to being equilateral as you can without compromising the intended shape or adding extra faces. Long thin faces become problematic sometimes because you risk an edge doing weird things during animation if it's too close to another edge. Switching to a shaded mode I notice a vertex near the top of where the pad meets the arm needs to come away from the arm underneath. I move it up and have to turn the edge running down the arm towards the hand because it creates a crease. Well I check the arm and pad together and realize that 120 faces is too many since I still have to make the feet (565 + (120x2) + feet) = >800). So I delete some obscured faces on the arm that the pad will hide and look at the pad for some more drastic optimization than before. As you can tell the further into a model you get, the harder it becomes to adhere to your design. Making intelligent decisions on deviating from your initial concept is one of the more daunting aspects of character creation. Luckily, Adrian and I have been a concept/modeling team for over 25 models now so I pretty much know intuitively what he's trying to accomplish. Much like a comic book team where I'd ink Adrian's pencils, my 3d realization of his ideas gets modified for clarity and animation sake. In the end, though the finished product just has to be cool. Adrian's sense of depth in his sketches and over all design make it rare that I have to go to him for clarification but he has faith in my ability to keep the heart of his sketch intact when I do have to make modifications. Over the years through the feeling that I become overly derivative of my own work or simply stale with my own designs I actually prefer to contract another artist to provide conceptual designs that I build. I don't really have the time to draw and I always can change the designs subtly to suit my tastes once I get the concept sketches. This way of working also speeds up the production of a game since a full-time conceptual artist very much augments a team if everyone is into that approach. Knocking off about 20 faces combined I don't want to strip the objects any more than that for now. I can always dig somewhere else for some faces to get rid of but I never make it a habit of over optimizing something since in the end I can analyze the whole thing and be judicial in my paring. Kinda like doing textures double their target rez. You can always port down but you can't inject higher rez into a bitmap or image. Moving up to the upper arm we have to figure out what to do with the shoulder and bicep area to conform to the sketch. I know we can't put the spikes up there on the deltoid but maybe we can give it more of a segmented look. In this case I'll just have to rely on Adrian's texturing acumen to pull off the feel of a segmented bicep. The plate for the forearm is more important to the overall design to give the arm weight and dimension. Pushing the verts around instead of scaling them I try to give the impression of the volume of the upper arm with the given verts but accentuate an angular feel to the geometry. This keeps with the overall spiky theme of this creature. Looking at the sketch again I decide to go ahead and beef the shoulder up and give it a separated look by selecting the faces of the deltoid, detaching them and introducing you to a nifty little modifier I use occasionally. Great for quick and dirty capping that I use occasionally. Go to the 'more' button under you modifier list and under object space modifiers, click on 'cap holes' and the shoulder piece is now capped. Select the bottom edge of verts and scale them so they overlap the bicep. Then take the upper edge verts of the top of the bicep and raise them into the delt more so there's no chance of seeing the gaping hole at the top of the upper arm. Okay. Things are moving pretty fast now. I copy the finished arm over to the other side and look at the general shape as it now stands. The round shoulders seem to stand out from the general spiky nature of this beast so I pull the verts out to make them semi-spiky at the top. I do a quick check and discover we're at 787 on the faces so I look to some earlier geometry for optimizing opportunities. The head is the first victim and I knock off some faces mainly on top or anywhere the verts lie close to each other. I rarely use the Optimize modifier at this point because I'm utilizing finesse as opposed to brute force (axe vs. exacto). That's pretty much the case with any programmatic optimization. It uses no aesthetics. That's why I don't mind foregoing programmatic solutions for LOD (level of detail) because I want to have complete control over the LOD's. So anyway we're down to 775 now but even though it's still too high, I'll build the feet now and see where we end up overall. On second thought, what the fuck. I know the torso is pretty gratuitous so let's get on that and knock some face off. I pretty much brutalize the it being careful to retain as many of the segment supporting verts as I can. It goes better than I thought it would and I shave 20 faces off which at this stage of the model is damn good. Using the same trick I used for detached shoulders in Q2 I pull a vertex in at the base of the shoulder to prevent an overly large amount of separation at the shoulder joint. I rotate the arm as well anticipating the attachment in Physique later down the road. Shit. I can't get optimizing out of my pea brain. I spend some time just rotating around ole Sleeg and notice that the flared out verts at the bottom edge of the torso would probably not be missed if the central vertex got merged with one of the outer verts. I do this and get ready to merge the other Q2 Dude arm in with the gun hand attached (gun hand has less faces). Sike. I tried it and didn't like it. The cool thing about the flares is that it adds complexity to the look of the carapace-like torso at the cost of 4 faces. I keep the flares but decide I don't like the turned edge in the front which was a cheap way to give a segment to the sternum area. Time to put a fisted gun hand on the right arm that will be holding the gun during its animations. Ready to weld the new hand on after scaling and rotating into position, and deleting the arm of the gun hand and the hand of the target arm.
|