|
- About |
|
Thinking
Outside the Box: By Paul "Villam" Steed
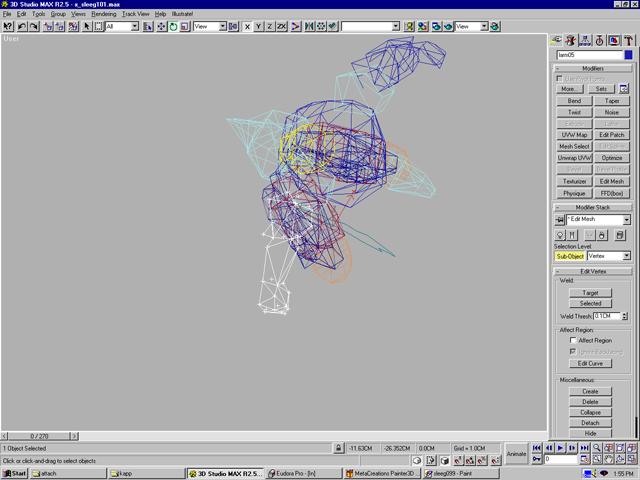
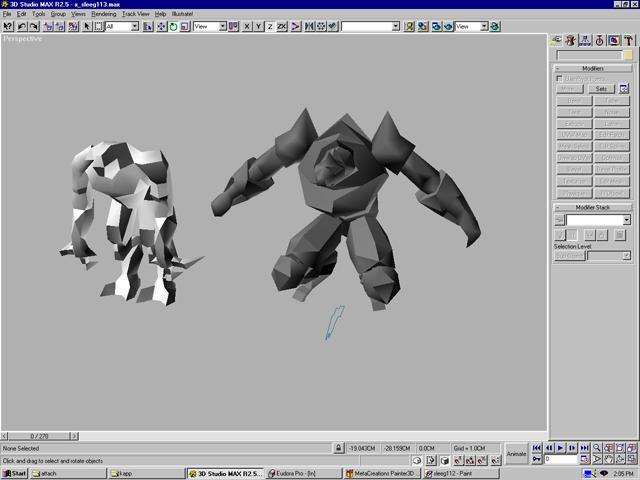
Changed the hand since I know from experience I'll have problems with the balled-up finger positions when I go to animate. What the fuck? I just don't want to do this guy's feet. I widen the spike at the very top of his hip object and thicken the ab object at the top adding more of a pronounced sway to it since I think it looks cool. I'm going to go ahead and optimize the top of the leg plate like I've been thinking about so I can finally move on to the feet. Jeesh. Procrastinator! First
I delete the left leg pad and select the right pad. Instead
of doing the usual [alt] h to hide Well I didn't want to resort to it but I had to take out the top back verts by merging them into their neighbors and the front two that created that distinctive angle where the kneecap joins the leg. Now let's copy and move the pad over and check the face count...
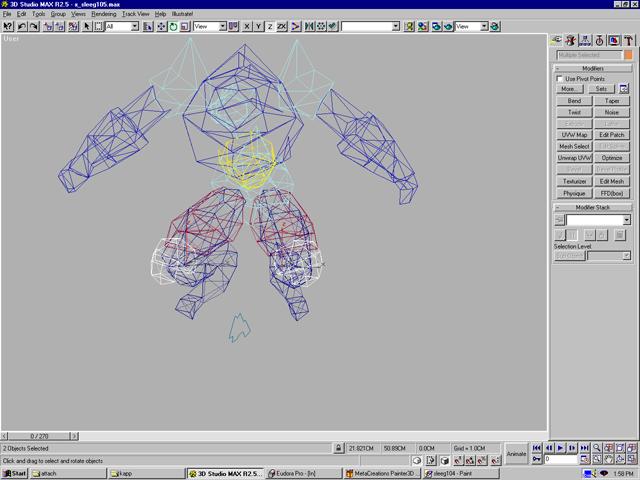
Well, even though we're down to 735 in preparation for the feet construction I think the kneecaps are a little gratuitous so I work on them a little bringing them to a level of complexity commensurate with the leg armor's level. Now
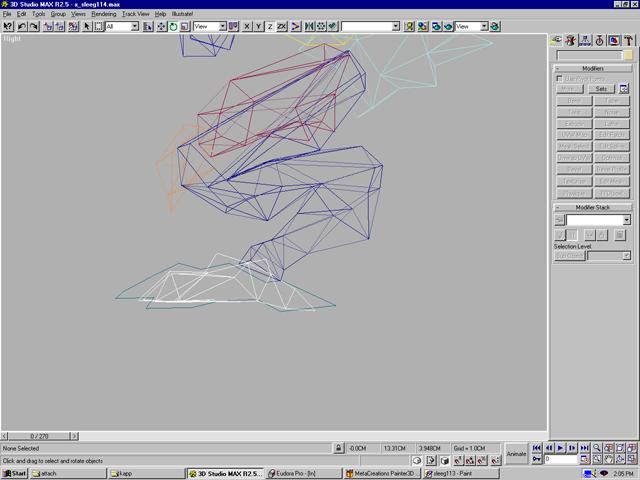
for the past several dozen entries here I've been using the
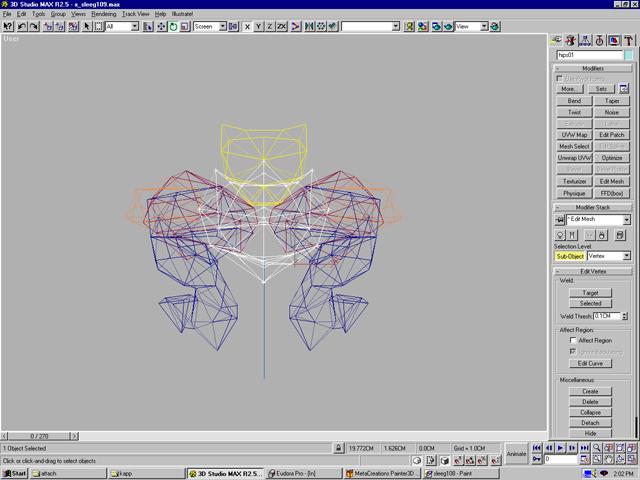
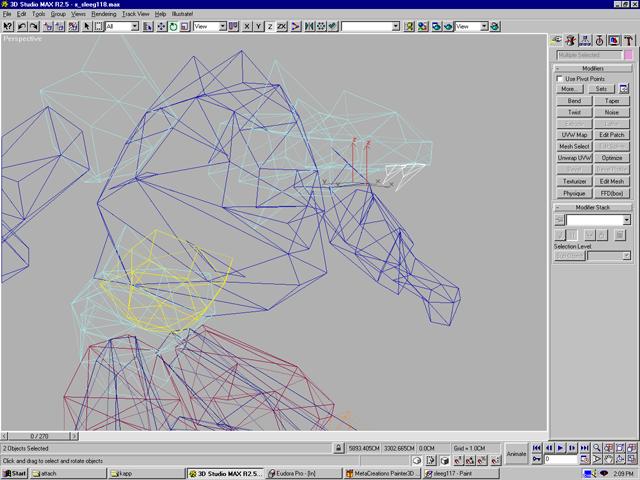
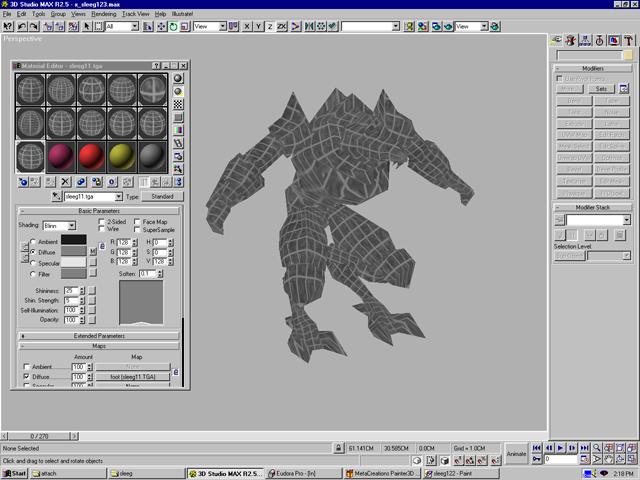
'screen' coordinate option for See what I mean? I moved these verts down and they went exactly where I wanted them without the usual axis changes I normally cycle through (like a little bit along x...a little bit along z...a little bit along y...etc., etc, fucking etc.) As I go to copy the optimized kneecap over to the other side a couple things worth mentioning just occurred to me. Whenever I copy and mirror symmetrical objects like limbs and stuff I automatically switch to the front or top view because it allows me to precisely line things up. I also clone the desired object always by [shift] dragging it toward the opposite side along the x axis only so that it doesn't move around in its relative position too much. Then I hit tool/mirror along the x axis instead of applying a mirror modifier to the object since basically I think that particular modifier is a cantankerous piece of shit. Of course I'm probably not doing something right when I do try to use it. Same goes for the Taper modifier for that matter. Both of these modifiers frustrate the hell out of me. Anyway, something else to note about cloning and mirroring something is that I leave the old kneecap on the left side until I move the new kneecap over. This way I can overlay them exactly, using the old mesh as a 3d guide for the new one. Then I simply hide the new mesh since it's selected - [alt] h - and then delete the old one. [alt] u gets my kneecap back and boom. There you go. Looking at the hips a couple things just caught my eye. Number one the right bottom of the hips is not the same as the left. Second, I think that the creature would look cooler without such a svelt midriff. Well I knock that out quickly. Applying an edit mesh modifier to two objects at the same time (actually took me awhile to figure out that I didn't have t attach two objects in order to affect their sub-objects at the same time. Duh. I scaled the verts and then deleted the left half and copied/mirrored the right half. Of course that cock-smoking, stupid-ass 'build face' command tripped me up with deciding that I had to build the face counter-clockwise this time instead of the clockwise it made me build it last time. Does anyone out there have this problem as well? Can someone PLEASE fucking tell me why it switches back and forth? Crap! The leg under the leg pad was poking through so I merged some verts at the top and brought the end top verts near the kneecap up and back to compensate for the lack of curvature at the top of the leg. Of course this means I delete the other leg and clone/mirror the changed one over. Always do this instead of repeating your work if you can help it. Performing the same modifications on a symmetrical piece of geometry 9Mirrored) is just plain amateurish, soldier. Now drop and give me TWENTY! Cool! We're now down to 711 faces! WHOO HOO! It's also more Lector Time since I just remembered the mutant from Q2 has nearly the same feet as this guy. Yay! I had to merge in the .dxf that I had up under an old Quake 2 modeling directory but hey, the feet are close enough for government work for me to use. So now I delete everything on the mutant except a foot and tweak the vertices adding a few here and there by dividing edges around the toes to give the foot more volume. Then I size it to fit the guide-line I laid out from the sketch. Well the foot takes way too long and requires all kinds of divides, merges and turns. Turns out okay, though. Let's check our count. Now comes the fun of attaching the foot to the leg. I delete some verts from the leg and divide a few edges at the base of the ankle to prep the leg for attachment to the foot. Then I attach the leg to the foot and proceed to join the verts together. I optimize the legs some more merging some verts on the top of the lower leg near where the foot is joined. I add some more volume to the foot and tweak the toe area pondering how much detail I really need to put there. I decide to keep the gap in the toes and make sure the dew claw has thickness. We're under 800 faces but not by much. Still, we don't have enough to do any major structural augmentation but there's one nagging detail in Adrian's sketch that I want to get in but haven't yet. This baddy has a goatee! Yep. Let's build a box, scale the verts at the bottom along the x axis. Merge the selected verts so you have a lofted triangle, basically. Next, split the edge at the pointy bottom, turn the edges so you can pull the vert up along the z. Nah. That's not working. Go ahead and just make a pyramidal shape, delete the face at the base, collapse one end of the base and scale the object along the x until it's thin enough to fit under his chin. Add some curvature to the backside by dividing the edge and make it basically look like the sketch. Move it into position and clone it, scaling the whole thing somewhat to again match the sketch. Cool! We are DONE building for now and we sit at 799 faces. Now let's delete his right appendages and start assigning some mapping coordinates and temp textures to this guy. When prepping a mesh that someone else will texture my main goal is to give them as much uv coverage as I can on the model. The way I do this is to create temp materials that are quick to make and are effective indicators of uv coverage. Thus I make a 128 x 64 texture (the largest single sized texture I have to work with per body part) and make grid lines on it every eighth pixel. This is my base texture that I create smaller textures from by cutting them from this 128 x 64 texture source. The reason for this is simple. If all the textures originate from the same gridded source then as I apply textures they have the same relative aspect ratio and let me apply uv tiling when necessary. The uniform lines also help identify problem areas on the mesh where a texture gets deformed. The grid also helps Adrian get a feel for how the texture lies on the mesh since he'll be using Painter3d to create the real texture map. The grid lines provide that first base layer to work upon in photoshop as well. I apply the textures in max and turn the 'show map in viewport' button on so when I go to a 'smooth and highlight' viewing mode I can view the texture. This is invaluable since I can rotate and tweak my mapping coordinates and get instant feedback on the model. For the head of Sleeg I use a straight cylindrical projection and apply a 64 x 64 texture to the object. For the torso I use a spherical projection because of the segmented look and spherical will get more into the cracks and crannies than a cylindrical will. I could put a 'uv unwrap' modifier on either of these to make sure the coverage is there but if it looks right in the view then it's good enough for me. In Quake3:Arena we apply textures to objects that are named after the .tga file used as the bitmap. All attributes except mirror in the uv dialog box reflect in the game once the object is brought into the world but attributes in the material editor don't reflect other than the name of the material. I do however usually turn the illumination of the map all the way up in a case of laying down uv's for another artist since I could care less what the texture looks like in shaded mode and only care about complete coverage. In the case of cylindrical maps coverage needs tweaked occasionally at the ends of the cylinder and in a spherical projection the top and bottom of the sphere warps the texture pretty bad and requires the projection to be rotated so those areas aren't seen easily. As I create and assign each texture I just name it numerically using the name of the character as the base. Descriptive files get cumbersome and I've found this to be the cleanest and least time-consuming method. So as of now we have sleeg01.tga assigned to the head, sleeg02.tga assigned to the torso, sleeg03.tga to the abs and sleeg04.tga to the hips. Sleeg01 and sleeg03 are 64 by 64, sleeg02 is 128 by 64 and sleeg03 is 64 x 32 pixels in dimension. Note they're all by power of 2.
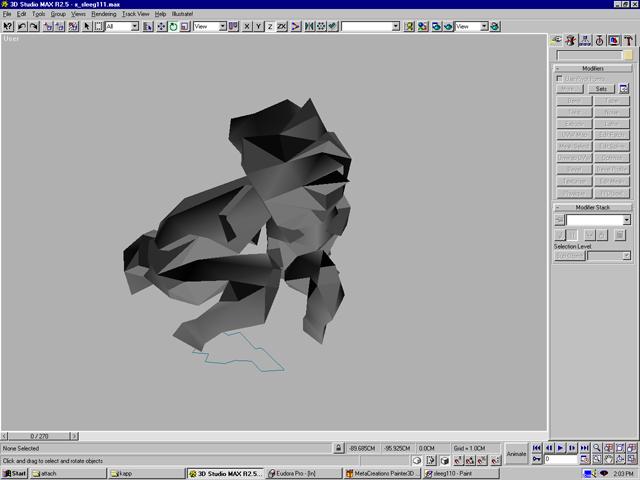
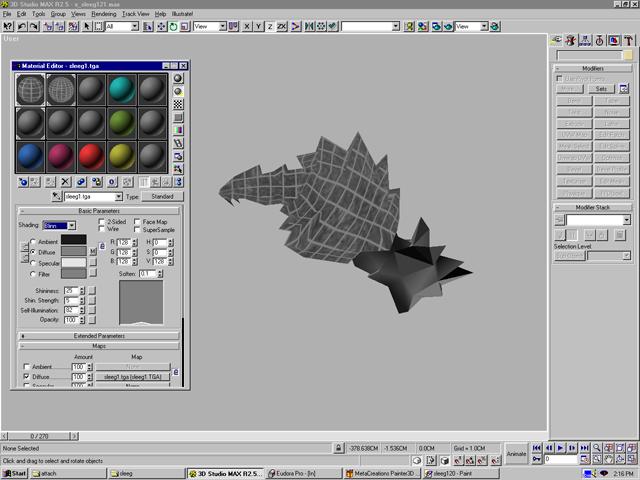
Finished. Normally I get away with a cylindrical map on an object so I typically have to divide continuous geometry like the leg into cylindrically mappable objects. I did this in this case and detached the foot as well. The shoulder got a separate texture too, but the bicep and forearm pad gets the same texture. Some other notes are I decided to apply a 128 x 64 texture to the main upper leg and the 64 x 64 textures to the lower pieces including the foot. The leg pieces naturally get cylindrical maps but the foot got a spherical because it gave me better coverage. I still had to apply a uv unwrap modifier to the foot and splay out the uv's for even more coverage but in this case a cylindrical projection just didn't work. I also changed the torso texture size to a whopping 128 x 128 because at 128 x 64 the pixels were too large compared relatively to the textures assigned to other objects around it. This is precisely the reason I use a grid to lay down initial textures and I recommend it unless you have a proven better way to do it. After everything is laid out and textured I copy the appendages back over to the other side. Doing this step last makes sense because the lengthy texture map tweakage is mirrored right along with the geometry and saves me time and effort. Again, any time you find yourself repeating work that could be copied and mirrored stop and do the right thing (tm). The other more pertinent reason to copy and mirror the appendages should be obvious: memory reduction. Of course asymmetrical geometry will more often than not require unique textures, but given a max texture page of 256 x 256 (or 192k) I try to find ways to maximize my pixels wherever and whenever I can. Mirrored appendages in the form of both geometry and texture usage seems the best course of action wherever possible. ps - Paul Steed is an incredibly opinionated 3D artist at id Software.
|