|
- Contents |
|
By
Rick "Flatness" Grossenbacher
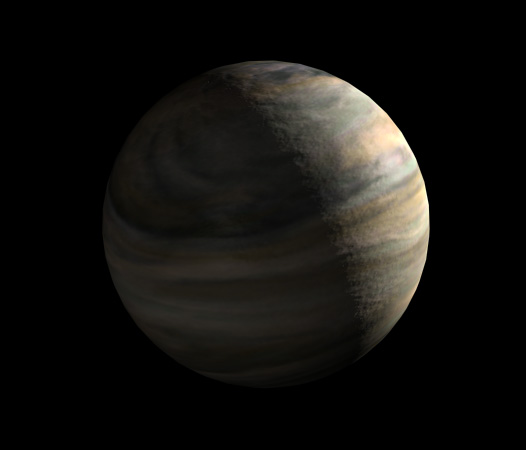
When I left off last time, I was explaining the creation of a planet. Just to recap, I made a bitmap of the planet’s surface, created a sphere in 3-D Studio, lighted the scene, mapped the bitmap onto the surface of the sphere, then rendered it. Please refer to the previous tutorial of Painting on Polygons if you haven’t already (or you may get lost with this one). For starters, when the planet was rendered as we had it, it looked like this:
Click the thumbnail to see a larger image. As I mentioned before, that image was looking quite stale. So, to liven it up and make it look more realistic, I decided to vary the bumps (created by the bump-map we set in the materials editor in the previous tutorial), and brighten up the colors. Since there is really no easy way to vary the sizes of bump-maps (via rendering) without it affecting the entire image we need to do a little trick. We’re going to make three separate renders of the same exact planet, but with different settings applied to the bump-map. 1. Bring up the Materials Editor. 2. Set the bump-map value to 0. 3. Render the scene. 4. Save the image of the planet as a TIF file to your drive by clicking the little disk icon located in the window with your rendered image. It is important to save it as a TIF file for the alpha channel. 5. Repeat steps 1 through 4 two more times. Once with 40 in the bump-map value box, the second time with the value of 100 in the bump-map value box.
I labeled all the essential parts in the Materials Editor for this bump-map. Remember, you don’t have to use a Raytrace Material, you can get away with a Standard Material if you want. After you have rendered all three of them, they should look something like this. Look closely at the size of the bumps in each of the planets.
Click the thumbnail to see a larger image. As usual, I suggest bringing the big image into Photoshop and viewing it there after pressing the f key twice and the tab key once to clear the background to black and hide your menus. In most cases, it’s hard to look at an image critically inside of a web browser because the brightness of the pixels coming from the browser itself will drown out the image and make it appear darker than it really is. Ok, if you haven’t already, close up MAX and go into Photoshop.
Alpha Channels Now it is time to bring Alpha channels into this phase of the tutorial. When you rendered your image in MAX, an Alpha channel was created. Think of the Alpha channel as sort of a silhouette of your image. Just like a real silhouette, you can’t see any colors, just a flat, black and white representation of the image. This is really cool because it makes pulling your image into Photoshop as a separate layer very easy because you can make a selection around your graphic based on what’s inside the Alpha channel. And guess what? We’re going to do that with the planets. 1. In Photoshop, open the first render of the planet that you made. 2. Bring up your Layers Palette. 3. Click the Channels tab.
You will see your RGB, Red, Green, Blue, and Alpha channels listed. The Alpha channel was automatically named "Alpha 1." Notice the little hand in the Alpha channel window. That is just me bringing my cursor into that section (I didn’t click the Alpha channel, just moved the cursor over it -- do not highlight the channel). Your cursor changes from a pointer to a hand. Do that with your cursor so it is in the same place where mine is. Then, hold down the Ctrl key and notice how the hand icon just changed into a hand with a hash-marked square around it. Now left click your mouse and boom-bam it just selected the planet. At first you might be thinking, big deal, it just selected it. But think again... You can do this with all kinds of images and shapes that you make in 3-D Studio MAX. For instance, about a year ago I created a satellite in 3-D Studio MAX that I wanted on a layout with text and other graphics. Well, the satellite was so complex with shapes that it would have taken me forever to cut around the edges (and in little holes, etc.) in Photoshop so I could put it over top of my background. But since I had an Alpha channel, it only took me a few clicks and it was chopped out and put on the background as a separate layer so I could freely move it around, tweak it, and see where I liked it best. I just saved myself a half hour of agony. Ok, back to what we were doing... Now that your planet is selected cut it (Ctrl X). Create a new document (make sure you set the document large enough so you have some space to work with, and paste the planet in the newly created document.
|